"Hollow trunk": a house-shelter for spending the night in nature. Protective structures, shelters for the night and from bad weather Makeshift beds for overnight stays in nature
Hello friends!
I don’t know about anyone, but in order to have a good rest on a trip, I need to sleep well.
If we spend the night in a tent, then it should be warm, dry and soft. Especially when we have children with us. The stove gives heat, dryness is correct, but how to achieve softness? Today I propose to figure out how to make a camp bed "home-style" comfortable and convenient.
Based on my own experience and the experience of friends, I can say with confidence that there are three main options here: karemat, self-inflating mat or air mattress. There are, of course, a bunch of home-made options - for example, laying a place under the tent with straw, spruce or moss, or you can carry ordinary wadded mattresses with you, but we will not talk about them here, since it is much more convenient to use special camping equipment.
The main purpose of a rug or mattress in a tent is to protect against cold and damp coming from the ground and smooth out uneven terrain under the tent. Each type of bedding has its pros and cons. So let's take a closer look at each option.
Karemats
These are foam mats: polyurethane foam or polyethylene foam, usually rolled into a roll. Their main advantages include comparative lightness, compactness and low cost. Such a mat is easily attached to a backpack or placed inside it and does not take up much space. Ideal if you are going hiking.

It can be used not only as a mattress under a sleeping bag, but also as a bedding on the grass for children's games or as a wind damper for gas burner. (I recommend having this rug when traveling with kids, even if you don't intend to sleep on it)
Karemats will completely protect you from dampness and cold coming from the ground, but you will have to adapt to the unevenness of the soil.
Such a rug does not require special care, just avoid sharp stones and branches and keep it away from the fire, as sparks can burn it. It will be even better if you purchase special covers that protect it from damage.
When choosing a karemat, give preference to two-layer ones, as they are more durable and reliable than thin single-layer specimens and you can use them not only in warm weather.
Air mattress
Many people use them not only in a tent, but also in a car, and during the day they also manage to swim on them. They are usually made of rubberized fabric and are a mattress that needs to be pumped up with a pump. If you drive a car, there are usually no problems with pumping, the pump is always with you. And some manage to pump it up from the exhaust pipe 🙂

The pluses include the fact that it copes well with uneven ground and, as I already said, during the day it can serve as entertainment in water procedures. Well, and perhaps relatively cheap. The rest is cons.
- Firstly, if you sleep on it together, you will sleep in one pile, rolling towards each other (but maybe this is not a minus 🙂)
- Secondly, it has to be constantly pumped up, even if there is not a single hole, since it tends to release air slightly under the weight of the body. And in the morning you will still wake up half-sitting.
- Thirdly, very low thermal insulation due to the fact that you actually have to sleep in the air, which quickly cools from the ground. In order to combat this, you have to put an extra blanket between the mattress and the sleeping bag.
- And of course, these mattresses are very prone to punctures, so be sure to bring a repair kit with you. Somehow, with a friend in the forest, even without male participation, we managed to seal such a mattress with superglue and a piece of a car tire. As a result, it broke in three other places, and our patch served faithfully.
It is unlikely that anyone will drag him on a hike with him because of the large weight and the space occupied.
Self-inflating mats
This is a hybrid of a karemat and an air mattress. It will smooth out all the bumps and provide the necessary comfort and warmth.


It differs from karemat in that the internal structure consists of open-cell polyurethane foam placed in a sealed polyester shell.

Unlike an air mattress, it does not need to be inflated. Simply open the valve and the air will fill the mat itself. True, this process can take from several minutes to half an hour and a small pump or mouth will be required. The latter is not recommended in cold weather, as the moisture contained in the air exhaled from the lungs can freeze inside the mattress and reduce its thermal insulation. It is also easy to lower the rug - open the valve and turn off.
Such a rug requires careful treatment, just like an air mattress, since it is also prone to punctures, but to a lesser extent, and if the puncture is small, the repair kit will correct the situation.
The main disadvantage is its price, but it pays off a hundredfold with a “soft” sleep for those who do not want to lie down on their sides on a regular karemat.
Everyone determines the level of comfort that is acceptable for him on vacation. Here's the one we chose for ourselves:
We bought the mattress in the largest online store for hunting, fishing and active rest in nature Cabela's. Take a look and you are sure to find something for yourself. They have constant discounts and sales. How to place an order in this store told
And if you have no experience of online shopping, please contact me - I will definitely help you.
How do you sleep? Share your experience in organizing your sleep in a tent in the comments.
Overnight in the forest - How not to freeze
Imagine a situation of extreme survival in cold weather, when your clothes are not able to protect the body, and there is no corresponding equipment at all, or it is very limited and ineffective. An exhausted person with a risk of hypothermia needs to sleep, but you know that you will never wake up if you pass out.
I will tell you how to survive in such a situation. There is a way that can provide a comfortable, warm place to sleep in inclement weather, even if your clothes are not adapted to low temperatures and you have little to no equipment or special survival skills in wild nature, except as an opportunity to build a special place to sleep and light a fire. In fact, you will have to take care that such a "bed" is cool enough to sleep in!
A special survival "bed" that will keep you warm in cold weather and can save your life is called a "fire bed" or "charcoal bed".
Before I start explaining how to build a place to sleep, I would like to emphasize that if you are not in a real survival situation, but just practicing, try to give Special attention conservation environment with minimal damage from your actions. Avoid damage to the roots of trees and plants, be careful with fire in the wilderness.
Show respect for nature and it will definitely take care of you!
Requirements for building a "fire bed"
Since the creation of a "bed on the coals" requires a lot of time and effort, it is important to first find appropriate place. You need to search various features, which will facilitate the manufacture of the "bed", as well as natural materials necessary for its construction and creation of additional comfort.
Preferred Areas:
1. Protected as far as possible from wind, rain and snow.
2. With soil that you can dig to a depth of about thirty centimeters and not run into large stones, tree roots, ice or water.
3. Places rich in dry fuel to keep the fire going. Hardwood trees are preferred. They burn longer and create a hotter flame. Soft rocks burn out quickly and give off a lot of sparks.
4. Places with an abundance of bedding dry material (leaves, pine needles, grass, cattail (cat's tail), etc.) to isolate the body.
Let's consider each item in more detail.
Weather-protected areas
If possible, choose a place with natural shelter. Rock ledges, overhanging thick trees, and even fallen tree roots can provide good shelter compared to open countryside. You will need to find a piece of flat ground that is at least half a meter or a meter longer than your body and wide enough to sleep comfortably.
Suitable soil for digging
Since you will need to dig a hole in the ground, choosing the right soil is extremely important. Give preference to areas where:
* Groundwater is not close to the surface. If you get to the water - you need to dig elsewhere.
* The soil is easily cultivated with improvised means.
* Few roots or large stones that make work very difficult.
* In snowy areas, look for a place where you don't have to dig too deep to the ground.
If you do not have a shovel for digging - do not despair! Use your cutlery set, a knife, a sturdy stick, or even your own hands.
Usually, in cold climates, the soil freezes to a considerable depth. Depending on the situation, you can find soft ground at the foot of the southern slopes, where the sun's rays warm the ground enough. Or you can build a fire to melt a layer of soil before digging.
Fuel for the fire
A good "bed on the coals", as the name suggests, requires a layer of hot and long smoldering coals. For this reason, the best fuel for building such a "bed" is hardwoods. If possible, arrange your lodging for the night near a source of dry fuel.
Soft woods can also be used, but they are not capable of producing the high quality coals more typical of hard woods. Dry grass and other natural materials do not leave coals, but can be used to start a fire and warm the earth.
Hardwoods: hornbeam, eucalyptus, pear, cherry, apple, elm, teak, hickory - North American hazel, beech, oak, birch, ash, maple, walnut.
Soft tree species: linden, spruce, fir, aspen, cedar, alder, hemlock, pine, chestnut, willow.
Insulation material
In case you don't have enough warm clothes on, and your sleeping gear is ill-adapted to cold climates or is missing altogether, you'll need a good source of dry, soft material for insulation and upholstery. Usually, the forest floor is a nice natural "blanket" of foliage, evergreen needles and grass.
Even in areas with deep snow cover, if you try hard, you can find insulation material. Inspect large boulders, where the ground around the stone is often not covered with snow and dry leaves accumulate there (by the way, a good place for accommodation). Check the southern slopes and patches of evergreen forest, which is usually less snowy.
In winter, wet areas (swamps, rivers, lakes) can provide you with excellent thermal insulation material in the form of cattail and reeds. These plants are easy to get to as all the water freezes and the snow is blown off the smooth icy surface.
A canvas or tarp, a woolen blanket, polyethylene or other similar material (waterproof and/or heat retaining) can be a great help.
survival situation
Let's imagine that your truck breaks down in a remote mountainous area and you have to spend the night in cold weather outside, without special equipment. Your clothing consists of sneakers, thin cotton pants, a T-shirt, a cotton jersey and a cap. Of course, you had to use a three-layer clothing system, but no one could have imagined that the truck would ever break down - this is the main mistake in the mountains.
You also have a foldable army spatula, an old woolen blanket, and the ability to start a fire (flint, matches, lighter, you can use a car battery or even a cell phone battery).
You can make a “fire bed” without a blanket or a shovel, but without fire, nothing will come of it. Therefore, it is extremely important to always have an emergency kit with you, which will store waterproof matches or, even better, a flint and a magnesium bar.
For work
As soon as you decide on a place, start digging a trench of the following sizes: width - about 30-50 cm, length - about 180 cm, depth - 30 cm. Do not scatter the earth at random, but carefully fold it into a pile. We will need stones later, so separate them from the common ground.
After the trench is ready, line the bottom with fist-sized stones, leaving a gap of 2-4 cm between them. Stones are not absolutely necessary in principle, but they will help to create an air gap so that the fire will be hotter and better coals will be obtained. If you didn't find enough stones while digging, you can look for them somewhere nearby, just don't collect porous or layered stones, as well as those that were in the water. When heated, they may explode!
Now you can light the fire. For tinder, I used dry pine needles and a pine cone. When the fire flares up and the first coals appear, scatter them throughout the trench so as to cover the maximum area. Our goal is to maintain an even fire to form coals and heat the soil around the entire perimeter of the trench. Add firewood as needed and scatter the coals over the course of 2-3 hours. This time can be used for cooking, boiling water, and drying clothes or bedding.

Then sprinkle the coals with a 10 cm layer of soil and tamp it well. Make sure all coals are well dusted and that steam or smoke does not break through the soil layer.
Everything, now it remains only to wait. It should take an hour or so before you feel the pleasant warmth of the heated ground. If this happens earlier, then most likely you need to add another 3-5 cm of earth from above, otherwise your "bed" may be too hot for a comfortable overnight stay.
It remains to prepare the "mattress". Look for dry, soft material and pile it up. When the coals have sufficiently heated the surface of the trench, you can cover the ground with an even layer of insulating material. The thickness and amount of insulation depends on the specific conditions and your capabilities. It is recommended to use a layer of at least 20-30 cm in thickness.

Several logs laid parallel to the sides of the trench will reflect the heat and keep you warm. In addition, they will serve as a windbreak and will not allow you to slide onto the cold ground.
results
When I made this bed, the ambient temperature was about -4 degrees Celsius. Four hours later, the temperature of the ground surface above the coals reached 43 degrees, and the ground within a radius of 30 cm from the trench was slightly warm. By changing the thickness of the bedding material, the temperature of the "fire bed" can be adjusted.
The main problem when using such an overnight stay is evaporation. This is because the soil and/or the material used for insulation usually contains moisture. As a result, the heat from the coals turns the moisture into steam and you get something like a sauna. For this reason, it is advisable to use only the driest body isolation products. If possible, lie down on a waterproof material (plastic, tarpaulin, canvas, polyethylene).
The next morning, fourteen hours after the bed was built, the air temperature dropped to -8 degrees Celsius, and the surface temperature of the ground was still around 32 degrees. This is a great result!
This technique of creating a comfortable warm place to sleep will allow you to survive in cold weather without equipment and special clothing. Good luck!
In order to sit comfortably in, you need two trees standing side by side at a certain distance from each other. This condition is far from always possible to ensure, for example, when fishing on the river bank, as a rule, only shrub trees grow. In such a situation, you can create comfortable conditions for an afternoon rest or an overnight stay by building a camp bed with your own hands based on a hammock net or the same hammock, but made of fabric.
Such a camping or garden bed is more convenient for many people than a hammock, since you can lie on it without bending, you can lie on your side and stomach.


Dimensions and other features of the bed. The length of the supports is 4 m. The dimensions of the network are 1.3x3m. The side of the cell is 5 cm. The circumference of the outer cells is 40 cm. The rope with a diameter of 3 mm from which the net is made can withstand a load of 150 kg and even more. Knots need to be made simple and small, otherwise they will affect comfort. The rope is good twisted nylon and not thin, as a thin nylon thread is prone to stretching. A nylon rope, but not twisted, but in a braid of the same diameter will stretch more and its strength will be lower. You can, of course, use a tarpaulin or other durable fabric instead of a mesh.
Let's imagine that as a result of some natural or other disasters, you ended up in the wild. You realize that the charms of civilization are not here, and you will have to live here for some time. Naturally, the first concerns will be finding water and food, but building a shelter, is the third pillar of survival.
Build and more find refuge in the wild- that's more entertainment. After all, in addition to building a roof over your head, like walls, so that rain and wind are not terrible, you also need to take care of a place to sleep. Sleeping on bare ground is fraught with consequences.
Of course, the most reasonable option would be to get out to civilization and people, and not sit still. However, if you do not have a card or GPS navigator, and you do not know the area well, or do not know at all, good option it would be to stay put and wait for the rescuers.
There are a lot of articles and tips on building huts from "shit and sticks", we would like to focus on place to sleep and rest. How and from what to make bed for the night in the wild, so that your neck and back do not hurt in the morning?
Most often in the wild couch do it right on the ground, using grass, branches, leaves. However, if there are conifers in your area, in particular the common fir, it will be a very good idea to use it. Fir branches are lush and resilient enough to assemble a semblance of a bed from them, durable and comfortable.
When will you collect branches for the bed, take long branches, 50 centimeters each, and short branches, 25 centimeters each. Lay long branches directly on the ground to create a “frame” for the couch, and short ones on top of long ones to form an elastic surface. On top of all this, we advise you to use something to isolate and avoid contact directly with the branches. The fact is that the needles release resin, and if you sleep directly on the needles, then your clothes and skin will be sticky. Of course, the resin is washed off after drying, but still not very pleasant. If you happen to have a blanket or cape with you, lay it on top of the branches and sleep on it already.
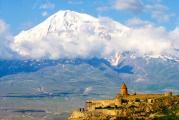
Is it possible to use grottoes and natural depressions in the rocks as shelters?
Of course, people have been using them for hundreds of years. Such natural shelters usually quite strong and reliable, they will shelter from winds and storms.
Grottoes are usually formed as a result of landslides and erosion of rocks, or from the impact of tree roots growing on the edge of the rock. Therefore, when you find such a shelter, pay attention to the following things:
- Carefully inspect the grotto along the entire inner perimeter. Inside there may be small animals or, worse, snakes. In some regions, scorpions can also be added to this charm. Therefore, before settling down for the night, make sure that you do not have neighbors.
- Put in a little order. In grottoes, there can often be natural debris, branches, stones, foliage blown by the wind. Clear the area inside as much as possible, this will increase the usable area, and you yourself will be more comfortable.
- Protect from the rain. Assemble from branches and leaves a semblance of a door that can close the entrance to the grotto in case of heavy rain and prevent water from entering inside. Also make sure that the water is free to move away from the grotto.
All of us, lovers of nature outings, sometimes have to stay overnight in the forest or near a reservoir. Sleeping places arrange everything in different ways, some in a car, some in a tent, and some in a boat. But not everyone can drive a car to the desired point or to hiking you have to sacrifice a tent to take other things with you. Yes and sleep under open sky or in a hut made of spruce branches, much more pleasant than in a tent emitting the smell of impregnation. Fresh air and the pleasant smell of pine needles create a wonderful atmosphere for sleep and relaxation.
I often have to spend the night in the forest and it is extremely rare to use a tent. I use the tent only when I go on a trip to hunt or pick berries or nuts for several days. In autumn and even winter, when hunting on foot, I always take plastic wrap or tarpaulin 2.5 - 2 m with me. ) pick up comfortable spot(where there is more firewood and some natural shelter blocks the wind) and set up camp. First, I make a fire, then I chop thin poles - I build a frame for a canopy from them (see the figure), I attach a film to the frame on top, I press the lower edge with a cobblestone or a log. Such a shed shelter serves as protection from the wind and as a heat shield. Then I chop spruce branches and arrange something that looks like a bed. After cooking and other things, I throw firewood into a fire located 50 - 80 cm from the bed and start sleeping. If the air temperature is below +5 C *, I prepare in advance two or three dry logs with a diameter of 30 - 35 cm and 2 - 2.5 m long, I make a “nodya” fire from them (it burns evenly all night and also gives even heat).
You can also make a hut from improvised materials (for those who walk lightly), but it will take more time to build it than for a film shelter. Although the hut has its advantages.
A properly folded hut protects well from rain and even from hail (according to my own experience), water rolls off it like from an ordinary roof.
Almost everything that you find nearby (spruce or fir spruce branches, reeds, hay, straw, grass) is suitable for its device. First you need to prepare thin poles (dimensions in the figure), two strong flyers and a support pole. We start with the installation of flyers, this stage of work must be approached very seriously. this is what actually keeps the whole hut. Flyers should be driven vertically into the ground for almost a third of their length, so they will stand firmly and not deviate from the weight of the side rolls. We lay a strong pole on top of the flyers. Further, on the support pole vertically - obliquely we adjust thin poles (rafters) at a distance from each other (as shown in the figure). After the rafters are ready, we lay the material that we got in the vicinity from the bottom up in rows on them, so that the top row covers the bottom one. We close the back wall in the same way as the side rolls.
To sleep in such a hut it was warm and cozy, you need to place a fire near the entrance and, behind the fire, arrange an inclined heat shield towards the entrance to the hut.
How pleasant it is to wake up early in the morning in a cozy hut from the singing of birds - only people who have told all the delights and hardships of wandering and communicating with nature know.