Tu 154 good or bad aircraft. Tu154
Massage with a birch bath broom is an excellent remedy for pain in muscles and joints, contributing to faster and painless recovery after various physical exertion. Birch helps to normalize the condition of acne-prone skin, accelerates the healing of minor wounds and abrasions, and soothes the body as a whole.
One of the most pronounced medicinal properties birch broom has an intense positive effect on the bronchi - the substances contained in the plant contribute to their expansion, which normalizes ventilation of the lungs and facilitates sputum discharge. That is why experts especially strongly recommend the use of birch brooms to smokers and patients with asthma and allergies.

The composition of birch leaves contains vitamins A and C, many essential oils, tannins and other useful components. In order for them to be fully preserved in a broom and to show their beneficial effect as efficiently as possible, you need to know, firstly, how birch leaves are harvested for a bath, and secondly, how to use the finished device correctly. It is with this information that you are invited to familiarize yourself with the study of the information below.


In ancient times, the preparation of bath brooms was traditionally done 1-2 weeks after the Holy Trinity Day. As a rule, this holy feast falls in June. In addition, due to significant differences in climatic conditions in different regions of Russia, it is not worth focusing on only one folk custom - in many areas the birch does not have time to blossom by the Trinity, and there is little sense from a broom from such branches.

The principle is as follows: we focus on the characteristics of birch ripening. The maximum strengthening of the sheet will indicate the imminent appearance of earrings. This short time period, when the leaves are the strongest, and the earrings are not yet available, is the most suitable for preparing the right bath brooms.

Bath brooms are traditionally made from weeping birch. Usually these trees have a rather impressive height, while possessing long, strong and quite flexible branches. Beautiful brooms are obtained from the branches of young and previously unflowered birch trees - such trees have the most delicate leaves.
Helpful advice! When choosing branches, make sure that the upper side of the leaves is not rough, the branches are straight and rather thin, and the leaves themselves are velvety and tender.

Photo of a weeping birch near a pond - a suitable tree for collecting raw materials
Branches can be cut with a sharp knife or harvested in some other suitable way. For greater convenience, the collector can climb a tree, bend it down, tie it to some neighboring tree and collect the required number of branches. Birch, as noted, is quite flexible and durable, so such manipulations, provided they are carefully performed, will not harm.

Important! Do not immediately tie the collected branches too tightly. The material is hung on a strong rope under a protective canopy so that direct contact with the sun is excluded. There must be a draft in the room. A week later, the brooms are already quite thoroughly dry. In this state, they are allowed to be laid out tightly on racks in a dry, ventilated room, for example, a dressing room or a barn.
It is better that the finished bath broom looks like a fan, and does not look like a broom. To comply with this recommendation, a fresh broom should be laid out on the floor and turned over daily, repeating until the products are dry. Otherwise, the material may dry out or dry incorrectly.

For example, if the harvester tightly ties birch branches from the very beginning, the leaves in the center of the broom will become dark and “burn out”, which is why they will have practically no aroma.
The color of correctly dried brooms is concentrated green, pleasant matte. The branches should emit a scent of balsamic birch oil, which intensifies when steamed.
It is also correct to collect branches on brooms in June for the reason that during this period the leaves already grow to a fairly large size, but retain the required level of essential oil glands, which are present, at the same time, not only in foliage, but also in young birch shoots. Non-old large shoots retain high elasticity, thanks to which whipping with such a broom is easily tolerated by a visitor to the bath.

Summing up the above, we can draw the following conclusion: branches with strong and young leaves are used to harvest birch brooms. Such foliage contains a maximum of useful components for humans. On the territory of Russia, depending on climate zone, the optimal time for harvesting birch brooms can vary from early June to mid-July.
Choosing a time and place to collect branches
The right time for harvesting determines the quality, service life, aroma and softness of brooms. For example, if you collect branches too early, subsequent steaming will make the broom flimsy, short-lived and slippery. A well-prepared product will “keep the sheet” for as long as possible.

A high-quality broom is fragrant, durable and “holds the leaf” well
Dry weather is chosen for harvesting. If the foliage is moistened with dew or rainwater, when dried, it will collapse, twist, fly around, darken. If it rained the day before, it is better to wait a few days, and only after that collect branches for the preparation of brooms.

To assemble branches, choose an environmentally friendly place, remote from highways and other pollutants. In practice, two-year-old branches growing near the ground have the best properties. For cutting, it is convenient to use a secateurs.

What to do with branches after harvesting?
An attic is well suited for storing harvested branches, even better - a pile of hay. For storage of blanks in urban conditions, a balcony or even a mezzanine is suitable. In this case, the brooms will need to be wrapped in paper bags first.

Drying brooms on the roof of the barn is also allowed. This is done in the following sequence:
- meadow hay is spread over the roof;
- birch branches with small gaps are laid out on hay;
- a layer of hay is laid out on top of the branches;
- daily (some experts advise increasing this interval to 2-3 days), the branches turn over. This is done throughout the month.
Most often, dried blanks are tied in pairs to a rope and stored in this position. You can not knit brooms at once, but combine branches into small sheaves. Sheaves are wrapped in hay and stored in the attic. Before going to the bath, the required number of branches is pulled out of the sheaf and tied into a broom.
Instructions for knitting a birch broom with your own hands

The image shows a step-by-step sequence of knitting a birch broom for a bath. For a better understanding of the process, check out the more detailed guide for this activity. The necessary information is presented in the table.
Table. Knitting a birch broom
| Stage of work | Description | A photo |
|---|---|---|
| Pre-spread dried birch branches on burlap and leave for a couple of days. Branches dried in this way are better suited for harvesting birch brooms. |  |
|
| At this moment, everything is individual: some attendants love massive brooms, others prefer small products. The only standardized recommendation is regarding the length: keep it within 0.4-0.8 m. A shorter or longer broom will simply be inconvenient to use. |  |
|
| At the location of the handle, knots and foliage are removed. In general, about a third of the total length of the product is subject to cleaning. |  |
|
| The peeled branches are collected together. The product, in this case, is given a flattened shape. The frame is created from thicker branches - they must be placed inside the future product. Thin blanks are laid out around the frame. Position them with an inward bend. The leaves should be facing in the same direction, and the branches should lie like a fan. In this case, the broom in the course of the bath massage will “hug” the body of the bather. One thick and dense product is enough for an average of 2-3 visits to the steam room. After that, it crumbles and becomes unusable. |  |
|
| Pre-cleaned and collected branches are wrapped with twine: with one hand you squeeze the workpieces, with the other you wind the rope. There are no secrets here: the main thing is that the branches are tightly fastened. A strip of fabric is wound at the end of the handle - without it, there is a high risk of getting blisters in the future. The recommended handle length is 150 mm. Most high quality is provided when tying the branches with twine in several rows near the foliage, and not along the length of the handle - a handle with a free end is more convenient to use, it will not slip out even with the most powerful movements. |  |
Helpful advice! When assembling a broom, add some fragrant herbs to its composition. For example, thyme and chamomile are well suited, mint and blackcurrant do not interfere. If nettles, spruces and other thorny plants are added, they should be placed inside the product to eliminate the risk of injury and discomfort.
Don't make the broom too heavy. At this moment, be guided by your own feelings: the product should be comfortable and light just for you.

Subsequent drying of brooms
There are many ways to dry brooms. Regardless characteristic features each method, one main general rule: brooms should dry in the shade. Direct contact with the sun's rays leads to rapid fading and curling of leaves, volatilization of fragrant and useful components, loss of aroma and external qualities. A broom dried in the sun will crumble immediately after steaming.

The room should have a moderate draft. The presence of powerful drafts is unacceptable, because. because of them, the final quality of the finished brooms will also not be the best. Ideally, the chosen room should be dry, cool and dark. During drying, brooms can be both folded and hung. To ensure uniform drying of the branches, as noted, the blanks must be turned over daily.
The easiest drying option involves hanging brooms from a pole or even a simple rope. To provide protection from the sun, the cord is pulled under a suitable canopy.

It was previously mentioned that the best shape for a broom is a fan. To ensure compliance with this recommendation, about a week after the start of drying (during this period, the brooms begin to rustle a little), you need to tightly tie the collected branches and lay the blanks tightly. They will cuddle and gradually flatten, becoming like a fan.
Some clarifications require a method involving drying in hay. First, the hay must be sufficiently dried and fresh. Laying of products, in this case, is carried out in circular layers. The foliage should be directed directly to the center of the stack. Fragrant hay is laid between the layers. Drying in such conditions contributes to the maximum preservation of aroma, color, as well as shape and quality characteristics.

It is possible that the first harvesting experience will end with the drying of the products. In this case, you should not get too upset and get rid of blanks - brooms can be “reanimated”. To do this, “marriage”, firstly, must be steamed for a longer (literally several minutes) time, and secondly, after steaming, the product should be held on the heater. Steam emanating from the stacked stones will contribute to the rapid restoration of brooms.

Important! After carrying out "resuscitation measures", be sure to remove the fallen leaves from the heater.
Recommendations for further storage of birch brooms
Having prepared brooms, ensure their proper and careful storage. The room should be cool, shady and well ventilated. Violation of any of the above recommendations will lead to yellowing and discoloration of the foliage, it will lose its aroma and freshness.
Hay is well suited for storing brooms, as well as for pre-drying them. In such conditions, the foliage will be even more saturated with useful elements, due to which its aroma will noticeably improve. For storage in urban areas, plastic or paper bags and vacuum packaging can be used.

If a bath broom crumbles due to repeated use, an excuse can be found for this - nothing lasts forever. Much more tragic are the situations when the foliage instantly flies around after the first steaming. This state of affairs is direct evidence of a violation of the rules for harvesting birch brooms.
You can find a description of the most common errors in the following table.
Table. Mistakes when preparing bath brooms
| Mistakes | Explanations |
|---|---|
| Wrong choice of time for collecting birch branches | A broom will inevitably fly around if it is made from too early or, conversely, too late collected branches. As noted, the best period for harvesting branches is June-July. In June, the foliage is already quite strong and dense. By the middle of the second summer month, the birch begins to prepare for the approaching autumn, which does not have the best effect on the characteristics of the foliage. |
| Violation of the rules for drying brooms | Often, inexperienced bath attendants, trying to prepare as many brooms as possible in the shortest possible time, dry the blanks in the sun. Yes, the products will dry out in just a day or two, but in this case the leaves will not endure even the first contact with boiling water. Remember: the broom should dry on its own and the heat of the sun will not help it in this. |
| Collecting branches after the rain | Firstly, the branches cannot be collected immediately after the rain. Secondly, the blanks cannot be washed on their own. If the issue of settling dust does not leave you alone, wait until you go to the steam room and pour boiling water over the brooms there - there will be no trace of pollution. |
Practice shows that brooms are best prepared with a small margin. However, you should not be too zealous either: it is much more pleasant to use a fragrant and fresh broom every time.

Before use, brooms are traditionally steamed. Fresh products do not need such preliminary preparation - they can become sour. Dry blanks before use are dipped for 10-15 minutes in cool water, then for a couple of minutes in boiling water.
If the birch broom is too dry, the steaming time can be increased. In this case, the basin is filled with boiling water, after which the product is lowered into the water and covered with a second bowl on top. Another a good option- dip the product in boiling water for a couple of seconds, and then put it on the heater. In this case, you need to carefully monitor the condition of the broom, slightly shaking and rotating it to prevent burning. Usually, 2-3 such approaches with a total duration of up to 1.5-2 minutes are enough to bring the broom back to normal.

It is more convenient to go to the bath with brooms together. The person undergoing a massage session is located in a supine position. It is recommended that the performer first wear gloves so as not to get blisters (if a fabric is wound around the handle, as recommended in the instructions above, you can refuse to use gloves).

Tune in right away: soaring with a broom is a whole science. First of all, remember the most important rules:
- massage is performed with a wet broom. Periodically, the product should be moistened a little warm water;
- touches with a broom to the body should be light, soft and barely perceptible;
- if the steam room is heated to more than 60 degrees, you need to use a birch broom as carefully as possible, otherwise the steam will leave burns.
Competent bath massage improves blood circulation, normalizes metabolic processes, gets rid of pathogens, strengthens the skin.
The traditional sequence of bath massage using a broom is as follows.
One person lies on his stomach and places his hands along the body. The second bath attendant takes 2 birch brooms and carefully, slowly, from the bottom up, strokes the torso of the first bath attendant. Brooms, at the same time, do not come off the skin. During the reverse movement, birch brooms are carried out on the sides of the body. You need to repeat all this 2-3 times.
At the next stage, the massage therapist lifts the birch brooms up to take in some heated air, after which he lowers them onto the lumbar region of the first attendant and presses them with his hand for a couple of seconds. Such manipulation helps to restore the spinal muscles after heavy loads, get rid of pain and quickly cure various injuries.

If you take bath procedures without brooms, then the effect of skin cleansing and the benefits of the procedure are reduced.
From pain in the lower back and back, the so-called. stretching. To carry it out, both birch brooms are placed on the lower back, after which one is assigned to the back of the head, and the second to the legs. It is necessary to make such a wiring at the same time. Similarly, the knees and shoulder blades are worked out.
Important! During the massage, you need to make sure that the brooms touch the body of the attendant, and not just move through the air. Violation of this recommendation in an overheated steam room will lead to burns. If an unpleasant burning sensation is detected, the broom should be moistened with cool water.
A very useful technique is fastening. Such a massage is carried out by providing fast lashing movements with the end of a birch broom on the bath attendant's body. The back is worked out first, then the lower back, and in the end they pay attention to the pelvis, hips and further to the feet. The whole procedure takes about a minute. At the end, the body of the bather is stroked with brooms, but at a higher speed than at the beginning of the procedure.

A stronger massage is whipping. It is carried out in the following sequence:
- the broom rises up to capture some air;
- all parts of the body are whipped 2-3 times;
- alternately with whippings, a “compress” is performed (described earlier, when the broom is pressed against the body for a couple of seconds).
Plowing is also an interesting and useful massage technique, which involves lightly waving a broom with barely perceptible touches on the skin. “Processing” is best to start from the legs, gradually moving up along the body, and then pay attention to the sides, moving in the opposite direction. During the procedure, light warm air currents will be felt.
If it is necessary to warm up the body more intensively, the broom should be periodically lifted up and shaken. A broom heated in this way is pressed for a couple of seconds to the lower back and shoulder blades, knees, and feet. If necessary, cool the product with cool water.
The massage ends with rubbing. To do this, the performer takes the broom by the handle, and with the other hand, slightly pressing on the part with foliage, slowly and gradually rubs the body. The legs and arms are rubbed along, the torso is worked out in all directions.
Important! After the described massage, a slight dizziness may occur - be careful in your movements.
Easy steam for you!

Video - Harvesting birch brooms for a bath
Everyone knows that you cannot do without an ordinary broom in any house or apartment. It is, so to speak, our first necessity. For those who have a plot of land, it will not be difficult to sow a small area with such a useful plant as sorghum. Of course, it's easier to go and buy this item for cleaning, anywhere in the market or in the store. But do-it-yourself is always better, especially since it is not so difficult to master the technology of knitting brooms. The main thing is to start.
So let's get started! First of all, you need to prepare the source material, i.e. raw materials. Harvest sorghum - crown usually in late autumn - in October, early November. After the seeds are fully ripe, the stems are cut just above the roots (about 12-15 cm from the ground). Each stem will need to be cleared of leaves and seeds. Panicles are best like this: with your left hand, take the stem closer to the panicle, and with your right hand, squeezing the panicle several times, hold it from top to bottom until the seeds are completely shed. Or, you can use a wooden block using it as a comb.
The stems cleaned in this way must be sorted by diameter, dividing them into thin, medium and thick, then tie them into sheaves and hang them for storage in any non-damp, ventilated room anywhere in the barn, summer kitchen, or in the attic. Give them some time to dry.
 Before proceeding directly to the very knitting of a broom, you should prepare a place for work and the necessary ones. To do this, you will need: not a thick rope with a loop at one end, about 2.5-3 meters long (Fig. 1), the rope itself must be strong and elastic (usually they use linen in a smooth sheath or the like); two boards measuring 350 x 40 x 15 mm, interconnected with a piece of thick rubber or leather, strong threads, soft copper, twine. The length of each thread (wire, tape) should be 40-50 cm.
You will also need two “needles” made of hard wire in order to flash parts of the broom (you can use a thick one instead), as well as a sharp knife to cut the stems. You can work both outdoors and indoors (depending on the weather). The main thing is that you have the opportunity to fasten the rope to the ceiling (), to the upper hatch of the door frame, or to any tree with thick and strong branches.
In order to tie a broom, it is best to use sorghum stalks that are not dry, then they will break less. If, during long-term storage, the stems are very dry, then before knitting a broom, they should be soaked for a short time in water.
Now we can start knitting a broom.
We securely attach the end of the rope (to the ceiling, to a branch, etc.) so that its lower end with the loop does not reach the floor level by about 25-30 cm. In this loop we install a kind of pedal - a piece of pipe, a plank, etc. .
 We take the required number of stems with a thickness of about 10 - 14 cm, align them with panicles, the main thing here is to collect the throwing part itself, so that it is not very thick, but at the same time, not rare. Then, the resulting beam is divided into 3 equal parts. Now each of these parts needs to be tied, for this we take one of them in our left hand, and approximately at chest level we wrap it with a rope, in a place just above the base of the panicles (as shown in the photo).
Then we press the pedal with our foot: the rope tightly tightens and compacts the stems in a bundle. Grasping the bundle with our hands and slowly turning it, we move the bundle up and down the rope, thus forcing the stems to become even more dense. When we reach the stop, we wrap this bundle with pre-prepared strappings. We do the same with the second and third beams.
 After completing this operation, you need to reduce the diameter of the broom handle, for this we cut the stems of two side bunches. We do this at a slight angle, stepping back from the strapping up the handle about 4-5 cm. It should be cut a little, just a few stems from each bunch.
Then we collect all three bundles together, so that the trimmings “look” into the middle of the broom and are inside the common bundle, and at the same time they must fit snugly against each other. We link this place, and we already do all the following links, retreating from each extreme about 10 cm, up the handle.
After the last tying, we cut off the remains of the stems with a knife on all sides to make a small bevel.
And the last thing to do is to form the lower (throwing) part.
To do this, put a panicle at a distance of about 8 cm from the beginning of the first tying of each of the three bundles, put it on one of the planks interconnected with rubber, so that the board lies across the panicles. We straighten the panicles and cover with a second board, after which we tighten the boards with wire.
On one edge of the boards, we sew the panicle with twine, or with a strong thick thread. You can see how to learn how to flash, although the article is about shoes, but the meaning of the firmware is the same.
There is nothing complicated in preparing bath brooms, but, like in every business, there are some nuances: you need to know when it is better to knit bath brooms, which branches to choose, how long they should be, how to keep brooms for the whole year without losing quality .
- 1 When to knit bath brooms
- 1.1 When birch brooms are harvested
- 1.2 Harvesting oak brooms
- 1.3 When to cut lime brooms
- 1.4 Preparation of coniferous brooms: spruce, juniper
- 1.5 How to prepare nettle brooms
- 2 How to choose branches for a bath broom
- 3 How to knit brooms for a bath
- 4 Proper drying
- 5 How to store bath brooms
Our ancestors prepared raw materials for bath brooms in the first half of June - on Trinity Day after Green Christmas. If you are far from church calendars and rituals, collect branches in early June, when the foliage has already grown and strengthened, but has not yet become faded and withered.
You can knit brooms for a bath yourself
For church holidays or calendar dates, you can only navigate by region: our country is large. Somewhere on Trinity it is already almost summer, but somewhere the leaves have barely hatched. So it’s better to focus on the state of the foliage.
When birch brooms are harvested
Not so much time is allotted for harvesting birch brooms: a maximum of a week. It is necessary to have time to prepare birch branches when the leaf has already turned green, and not light green, but before the earrings bloom. If time is missed, the foliage becomes very stiff and falls heavily in the bath. So the term for harvesting birch brooms is very short.
But time is not the only criterion. When choosing branches for a birch broom, you need to be guided by the appearance of the leaf. It should have a dense green color, the plate should be even. There should be no aphids, no other pests or diseases. But, most importantly, there should not be earrings on the branches. And for a greater effect, you need to cut birch branches on a broom in the specified interval, but after the rain. Only the birch must already be dry, otherwise, when steaming, the leaf will darken and curl up.
More advice from the older generation: cut a broom when a leaf on a birch is no larger than an old five-kopeck coin, and it should be slightly glued to the touch.

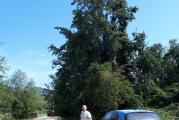
For birch brooms, choose young trees growing in the sun on a hillock or near a pond
But with sticky leaves you get a "soap broom". It affects the skin just fine: it becomes silky and soft. But at the same time, leave the steam room with skin covered with mucus. Not everyone likes this feeling. So choose here: either a more comfortable feeling with more “mature” foliage or elastic skin.
Birch brooms harvested in May smell differently than summer brooms: they add a smell very similar to the smell of propolis. At this time, there are light stripes on the skin of the twigs, which give off this aroma. Not all branches have such stripes; they must be selected separately. Running your hand along such a branch, you feel the tubercles - these are the very resinous odorous secretions. If someone has not tried - try. Very pleasant sensations, although the sheet is sticky at this time.
Some sauna lovers especially appreciate birch brooms that grew near water - rivers or lakes (but not in a swamp). In such plants, the branches are long, elastic and flexible. Good twigs growing roots or stumps of birches. They are flexible, resilient and tender.

Branches for a broom should have two or three branches
On trees, the lower climbing shoots are considered the best. They are cut for a broom. It is better not to cut single young ones without side branches, even despite a large, beautiful and dense leaf: a whip is obtained. And this is not at all what is required from a bath broom.
If the tree is young, you do not need to cut more than two or three pieces - you can harm the plant. Know the measure - take care of nature!
Old people who love the bath say that even in a birch grove you can not take branches for a broom from every tree. But only from those whose birch bark on the trunk, as it were, shines a little. Moreover, the spots on the birch bark are not gray, but rather brownish. There are not very many such trees, but they do exist. Try to find at least a few and fold the branches separately. Then evaluate the difference and next time you will not regret the time.
Birch foliage when harvesting brooms should be dense and smooth. Someone advises to try birch leaf language. If it is rough, the branch is not good, if it is smooth and velvety, it is an excellent raw material.

Separately growing young trees are an excellent choice
You can navigate along the leg of a young birch leaf. If it has already become reddish, you can cut it, and if it is green, it’s too early.
The video shows how to choose birch branches and knit brooms from them correctly.
We prepare oak brooms
The term for harvesting oak brooms is longer: starting from the end of June, and some harvest in August and early September. Depends on year and region. But even in the same region, year to year is very different. In some areas you have to hurry: later the foliage is affected by diseases, becomes lethargic or spotty. But sometimes, after being hit by diseases in August-September, the foliage on the oak grows again. That's when you can also get excellent brooms.
When harvesting an oak broom in summer, pay attention to the condition of the leaf: it should be an even dense green color, without spots. The main rule: there should not be an acorn yet. As with birch harvesting, branched shoots with a large leaf are taken.
But there are lovers who harvest an oak broom in September. In this case, the leaf turns yellow or yellow. They say it also works very well.
Bath gourmets value oak brooms made from tree branches, near which burdock grew. Their shoots are considered the most durable and flexible. Trees should grow in shady corners of the forest and be young: on old ones it is difficult to find non-knotted branches of sufficient length. Foliage should be large and abundant.

Chopped oak branches should lie down a little in the shade
The harvesting of oak brooms has its own specifics:
- firstly, cut branches are folded for an hour and a half in a shady place, and only then they can be transported;
- secondly, after the oak broom is tied, it is necessary to put oppression on it to give it the shape of a fan - this form is the most common, but some people prefer traditional spherical oak brooms.
If you want a linden broom with color, you have a week and a half to prepare. And that is due to different breeds that bloom at different times. In general, the best period is when most of the flowers have already opened. The aroma then in the bath is amazing.

Linden with color smells amazing, but they won’t be able to “work” normally - the leaf is soft
There is a linden broom and a later harvest. He also has a deadline of two weeks - from August 15 to September 1. This is what experts say, who claim that, of course, there are more useful substances in the previously collected linden branches, but the leaf on them is too soft and, when steamed, twists and wrinkles so that it is absolutely impossible for them to steam.
Preparation of coniferous brooms: spruce, juniper
The most "wide collection range" in conifers. There are no restrictions here. In Siberia, coniferous brooms are made both in the most severe frosts and in summer ...
Choose a warm, fine, dry day for harvesting. Cut off the branches begin after the dew dries. Choose young and flexible. There are no other recommendations.

It looks scary, but they say that with proper processing it is tolerated even by delicate skin.
How to prepare nettle brooms
Despite the "terrible" pungency, you only need to try the nettle broom. Then you will really like them to bathe. Harvesting them for the winter is problematic, except to insert a few branches into birch and oak trees. No other way. But fresh can be steamed all summer.
Cut off young shoots without color, about 40-50 cm long. It is made short and fluffy. It is better to work with gloves: it burns. It turns out it is quite soft: only for one person.

Nettle broom. Sounds even scarier than spruce. But the benefits are the sea
There are quite a few ways to park a nettle broom. Basically, they are dipped in hot (not boiling) water for 3-5 seconds, then in cold water. All.
The second option is to dip in cold water, then after steaming out, trample on it in the steam room with your feet, hold it over the steam, succumbing to a ladle of water.
Regardless of how you cook a broom, they need to “work” on the already steamed body. That is, you first need to steam out birch.
There is one point in using a nettle broom: it strongly stains the wood. Therefore, it is better not to put it on the shelves. Bring a mat, put it on it.
All other brooms (and what they are, and how they affect the body, read in the article “How to steam a broom for a bath”) are collected in the same time as birch brooms until August 2.
If you want to tie a broom of herbs, you need to know the timing of its flowering - at this time they have the highest concentration of nutrients.

Brooms from medicinal plants spread a magical aroma even when dry
How to choose branches for a bath broom
They cut branches from young trees that grow in sunny, wetlands, away from roads and enterprises with harmful emissions.
The length of the branches is selected depending on the selected size of the broom. Usually it is from 40 to 70-80cm. Who is comfortable. Similarly, the thickness of the handle is selected. The diameter rarely exceeds 5 cm - it is difficult to wave too large and heavy, although it is a matter of taste and habit.

The diameter of a comfortable broom does not exceed 5 cm
Branches should be smooth, free of disease and withered parts. The foliage is thick and juicy, not too hard. It is advisable to choose branches with two or three branches - the broom will not only be more magnificent and beautiful, it will also be denser, it will be good to “capture” the steam. Walking with such a broom over the body, you do not whip it, but massage it.
How to knit brooms for a bath
Having picked up suitable branches, they can be immediately collected into brooms. Some bath lovers advise pre-soaking them for several days in an unlit, well-ventilated place. They say the branches need to be “withered”. It is easier to work with them then.
Thicker shoots are located inside, thinner outside. If there is a bend on the branches (and most often it happens), then the bend should look inward. Also, make sure that the matte surface of the sheet is directed inward, and the shiny surface is directed outward. It should turn out so that their shiny side is directed in one direction. When folding, give the shape of a fan or "bouquet" - they do it differently. The broom-fan is more common: it seems to hug the body. Feelings are pleasant.

The easiest way is to tightly tie a broom with natural twine at the butt and at the beginning of the foliage
For the handle, the foliage is removed from the bottom. Its length is chosen individually, but the most optimal, established empirically, is two palm widths. It is also necessary to expose the butt of branches so that the brooms are better preserved during use. If everything is done correctly, then one broom can be enough for two trips to the steam room.
When folding the branches, they are turned over and shaken several times so that they are more evenly distributed. For knitting, it is better to use natural materials: dense twine, hemp rope, medical bandage or other similar materials. It is better not to use metal wire: it heats up in the bath and it is very inconvenient to hold such a broom in your hands.
There are several knitting techniques:

Used for knitting and clamps. Some are plastic, some are metal. They quickly tighten the handle, hold tight. And after shrinkage, it will be possible to tighten. So that all these puffs do not rub your hand, then they wrap the handle with a thick cotton tape: it is sold in hardware stores, sometimes in hardware or haberdashery. You can wrap the handle with a thick cotton rope (after using a broom, you can remove it and tie the next one).
There are many more ways to knit brooms. Someone uses sea knots, which make it possible to tighten the rope after shrinkage, someone puts two parts of the branches crosswise with butts, then ties them not very tightly, then connects the two parts with effort and ties them completely at the butt, and above. Almost every master has his own secrets. But they are very reluctant to share. Try simple methods first, then adjust as you like. There will be your personal method of knitting a bath broom.
Proper drying
No matter how you knit brooms, they still need to be dried. They are immediately stacked in a heap, one on top of the other. So they lie for a day or two. They flatten out under their own weight. Then they can be tied in pairs, and hung on a rope or pole in a dark, well-ventilated room.

If there is no attic, you can dry in the corridor: it is impossible for sunlight to fall on the foliage. But this method is available even to the townspeople.
If it is possible to hang brooms in the attic, they can be tied in pairs (without cutting off the remaining twine for tying) and hung to dry on poles. The best brooms are obtained under a double roof: the heat will not “burn” the leaf, but will dry it out. But ventilation must be good. If there is no such “luxury” as your own attic, you can hang a broom on a carnation in a well-ventilated place. In any case, you need to find a room where direct sunlight does not fall on it. Only in such conditions the leaf remains green and does not fall off.

Dry brooms hung on a pole or rope in pairs
With any drying method, brooms should not be placed close to one another - there should be free space between them. At first, in order for the branches and foliage to dry evenly, they need to be turned over once or twice a day. When they are completely dry, they can be stored away.
How to store bath brooms
Dried brooms can be stacked on a bookcase or shelf (again, the room must be dry and well ventilated). But from time to time brooms need to be shifted so that those that were below are in the middle or at the top. Moreover, light should not fall on the brooms: the leaf will turn yellow.

Brooms wrapped in film can be frozen. Good for those who have a freezer at home
If you have your own hayloft, you can stack brooms on dry hay, placing them loosely together. Top with dry hay. This is how our ancestors kept them.
For the inhabitants of apartments, there is also a storage method: make small holes in a cardboard box, put it in it without crushing the brooms, alternating the handle and the crown. In this case, you also need to periodically shift them, lifting the lower ones up.
You can also store brooms in the refrigerator: they are packed in a plastic bag or wrapped in cling film, put on the bottom shelf, in a dark, dry corner.
As you can see, it is not difficult to tie a bath broom yourself. But this is only the beginning. Brooms, even the most wonderful, can be spoiled by steaming it incorrectly. How to avoid such trouble, read here. Do not forget to read the article, "How to take a steam bath in the bath."
It is believed that oak has a special life-giving power. Even if you stand, tightly hugging a tree, you can feed on energy.
And after a steam room with an oak broom, you will feel renewed at all - if you had wings, it would be just right to fly. Those who like to take a hot steam, like oak products more than others. And since they have increased rigidity, they can be used simultaneously for a good massage.
Why are oak leaves and twigs so useful?
First, a little science: the leaves and twigs of the tree contain very useful essential oils, as well as substances called tannins (the oak gave them such a name). Thanks to their effect, wounds and abrasions heal on the skin, it becomes velvety and acquires a delicate dullness. Therefore, an oak bath is recommended for those whose skin is inflamed, prone to oiliness and excessive porosity.
In addition, the aroma emanating from essential oils will remarkably calm shattered nerves and relieve stress, help stabilize pressure (which is a godsend for hypertensive patients). And the cores in the steam room with an oak broom become much easier.
And thanks to the large leaves, firmly attached to the branches, such a broom works like a fan, quickly pumping steam.
Remember dates and places
In order to pamper yourself with an excellent accessory in the steam room, you need to collect good raw materials, then tie a broom and dry it, according to the canons.
The general rule for harvesting branches is: you need to collect them before lunch, on a day when the weather is clear and the dew on the grass has already dried up. If it suddenly started to rain, then it is better to postpone the trip.
For an oak, you need to go somewhere from the middle of June (usually after the Trinity). However, the best quality broom is obtained from raw materials collected in July. Then the leaves on the branches hold better, and they themselves become stronger. The end of August marks the end of the harvesting season. Although, if desired, you can pick up branches in September, if it is warm. True, the quality of the broom will be slightly worse.
In different regions, the harvesting season begins and ends at different times. But it should be firmly remembered that after frost this cannot be done categorically. Just waste your time.
When to go cut brooms, and how to do it? Looking for suitable oak trees
Both common oak (called Quercus robur) and Canadian oak (otherwise Quercus rubra or red oak) are suitable for brooms. The latter has leaves of large width and flexible long branches, which is convenient for knitting. There is also Caucasian oak, which is good because its leaves are especially thick and strong.
We choose oak trees with large leaves, growing somewhere in a shady place. It is better if they are three or four meters high. We take a pruner and cut a little of the side branches from each tree - so as not to ruin them. Only a year later, when the oak tree gets stronger, you can come back and take branches from it. They should be straight, flexible and about half a meter long.
Do you want the best broom? Then look for an oak tree with burdock hiding at the base of its trunk. And the most durable product is obtained from the branches of those trees that do not shed their leaves for the winter. They usually grow in the highlands.
When enough branches have been collected, let them lie down for an hour in the shade, spreading them out in one layer. Then we transport, trying not to pack the branches tightly so that they do not overheat on the road. And it will be a pity if the leaves fall off because of this.
How to knit a broom?
To begin with, we reject branches that are stiff or dotted with too little foliage. When knitting, the number of these branches is selected individually - they usually proceed from the thickness of the handle, making it 3 to 5 centimeters in diameter. In the place where it will be, the leaves must be removed (about two palm widths).

There are two ways to form a broom:
- The easiest way is to knit with a ball. To do this, you need to lay the rods evenly in a circle - you get a loose product that has a good volume.
- "Shovel" is the more popular method. We lay the rods flat, so that they press the branch laid earlier, and the outer side of the sheet looks in the middle. This results in a dense veil.
We remember that thinner branches should lie closer to the outer part of the broom, and those that are thicker will be good in the middle. To make it strong and reliable, we fix the product in two places. Where the rods diverge like a fan, we use twine. And wrap the handle around the edge with a cloth (you can take a medical bandage).
Watch how to knit a broom in the video. Remember tips.
To get more pleasure and benefit, we will put healing and fragrant additives in the broom. A pair of rowan branches will invigorate, and coniferous branches will increase the flow of blood in the body and drive away a cold. Bird cherry will serve as a bactericidal drug.
How to dry properly?
First, let's hold the finished accessory under pressure for about a day. This is if you need a flat shape. And then we hang two brooms on a rope where there is a draft and where the rays of the sun do not reach. It is especially necessary to protect them from them - so that the leaves do not overcook, removing all useful substances.

Preserving finished products
If you have a haystack (and suddenly), then you can bury branches in it in the form of sheaves. In this case, we bind brooms immediately before going to the steam room. This method avoids deformation of finished products.
Well, in urban conditions we use a glazed loggia or balcony, garage, dry basement. Any place where it is cold, not damp and there is a draft is suitable. You can wrap the products in paper or put them in cardboard boxes. There are also "advanced" options - vacuum packaging or dry freezing.
As soon as the leaves dry well (it usually takes about a week), our accessory is ready to go to the steam room. Feel free to drop it in hot water. However, you can take a freshly knitted broom with you, but we use warm water for soaking it.
Steaming in the bath with pleasure
Oak accessories are the most durable. They are enough for five times. But that's about. And so we look at the appearance of the broom - when it finally turns bald and becomes too rough, then you need to change it.

As for the steaming procedure, the easiest way to do it is this: first we dip the broom in cold water(for two or three minutes), and then - hot (but not boiling water). We cover the basin or bucket and wait until the oak begins to exude a wonderful smell. So - it's time! By the way, the remaining water does not need to be poured out. It is worth splashing it on walls and hot stones. Pleasant and helpful.
After the bath, we pour warm water on the broom to make it clean, and then we put it in a bag and take it to us. At home, you need to hang it on a rope and wait until it dries completely, then put it back in place.
You can take care of extending the resource of your bath assistant. To do this, in the morning we put it in a bucket of warm water for five minutes, then soak a rag in the same water, wring it out slightly and wrap the broom. We put all this in a plastic bag and leave it until the evening, until the steam room, where we dip the broom into a bucket of hot water.
Own or shop - that is the question
In order for a broom to really be useful, it must be made according to all the rules. If you made it yourself, you can be sure of it. And store products - this is how lucky. However, provided that they are purchased in a reliable place, there will be no misfire.

- In your own broom, you can add something for body and soul. For example, a sprig of rowan, Christmas tree or eucalyptus. And in finished goods will have to be content with what they give.
- Steaming in a circle of friends, it is much more pleasant to pull out an accessory knitted with one's own hand (or even present it to all friends). It will be very soulful.
- If you visit the bath regularly, with your brooms, the budget savings will come out quite good.